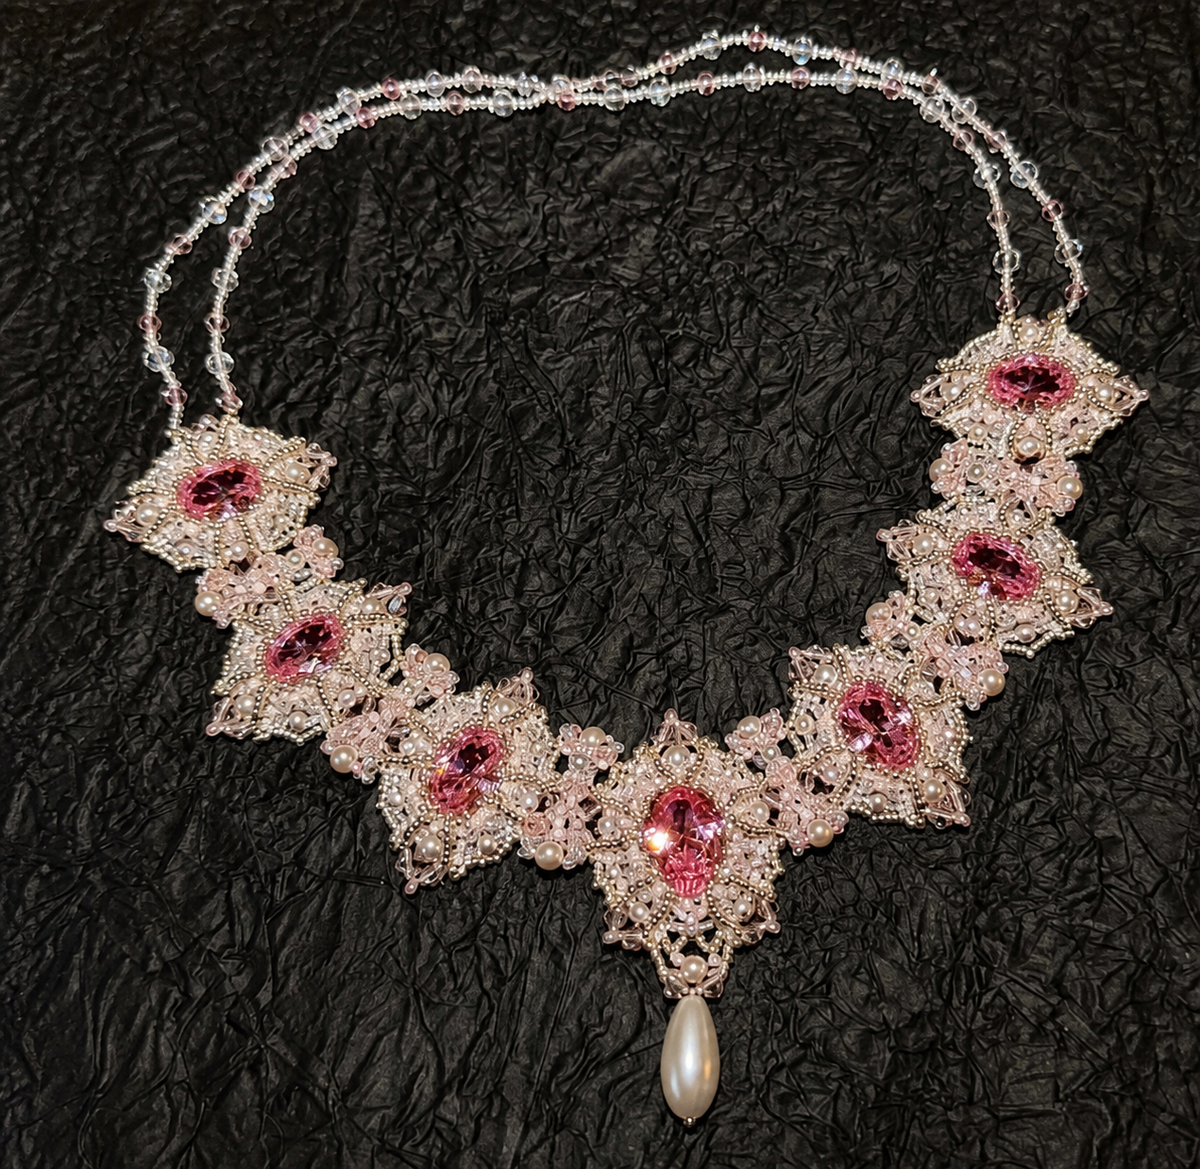
A statement necklace can look complicated because many small components repeat across the design. The easiest way to make one is to treat it as a sequence of matching beadwork units, then connect those units only after their shape and tension are consistent.
This guide is written for adults and careful beginners who want to try bead embroidery or decorative jewelry assembly. The BOCIYUAN French Vintage Beaded Statement Necklace Kit is an unassembled material kit with coordinated stones, pearl accents, beads, findings, and access to a step-by-step tutorial video after purchase.
Choose the right first jewelry kit
For a first project, look for a kit with a finished-project photo, clearly separated components, and a repeated pattern. Repetition helps you correct a single motif before making the rest. It also makes the final necklace look balanced.
Consider three things before ordering:
- Detail level: More bead rows and decorative clusters usually mean more assembly time.
- Wearable length: Check the listed circumference and how the decorative section sits at the neckline.
- Color contrast: A clear contrast between center stones, seed beads, and pearls makes the pattern easier to follow.
Set up a beadwork workspace
Work over a shallow tray or soft bead mat. Sort each bead type into a separate section and keep the finished-project photo visible. Use good overhead lighting, especially when working with transparent thread and pale beads.
Before threading, count the components for one motif. Keep that group separate so you can establish the pattern without mixing pieces from later sections.
How to build a beaded statement necklace
- Prepare the thread. Use a manageable length instead of one very long strand. Long thread tangles more easily and wears as it repeatedly passes through beads.
- Make one center motif. Follow the bead order carefully and keep the thread snug, but not so tight that the motif curls.
- Compare the shape. Place the motif on a flat surface. Check that its edges are even and the center stone sits straight.
- Repeat the side motifs. Use the first finished unit as a reference for bead count, direction, and tension.
- Connect the units gradually. Join neighboring sections and lay the necklace in a gentle curve after each connection.
- Add the neck strands. Measure both sides from the center so the decorative panel remains centered when worn.
- Attach the closure and drop. Test the necklace over a soft cloth before making the final knots or closures secure.
How to keep the necklace symmetrical
Work outward from the center and alternate sides: complete one unit on the left, then the matching unit on the right. Compare bead counts before closing each section. If one side begins to curve more sharply, check for a missed bead or unusually tight thread path.
Common beadwork mistakes
Loose gaps between beads
Support the finished section with your fingers and gently draw the working thread snug after each short row. Avoid pulling hard at the end of a large section.
Twisted motifs
Place every unit face-up before connecting it. A flipped connection can make the front and back alternate across the necklace.
Thread that tangles
Let the needle hang occasionally so the thread can untwist. Shorter working lengths are usually easier for beginners.
What to make after a necklace
If you enjoy assembling decorative components but want a project with larger pieces, try a DIY brocade bow hair-accessory kit. Ribbon layers and silver-tone ornaments provide a different construction experience while still developing pattern placement and finishing skills.
Browse all BOCIYUAN DIY craft kits for jewelry, light-up decor, framed art, suncatchers, and accessories. Every item is a material kit rather than a finished product, so the creative work remains yours.
Continue your DIY journey
Browse all BOCIYUAN DIY craft kits. Every product is an unassembled material kit, and tutorial video access is provided after purchase.